Reporting Your Time
Logging time in Celoxis is critical—it’s how our contractors get paid. There are a few ways you can report your time to the system, and the one you choose is a matter of preference. As long as you enter your time accurately and on time, you’ll be paid accurately and on time. You can:
Report time via task lists.
All tasks assigned to you can be found on your Celoxis dashboard, most often in the Tasks Due This Week section. To report your time to one of the tasks in this list:
- Find the task to which you want to report your time.
- Hover to the right of the task name to bring up the task’s kebab menu (vertical ellipsis).
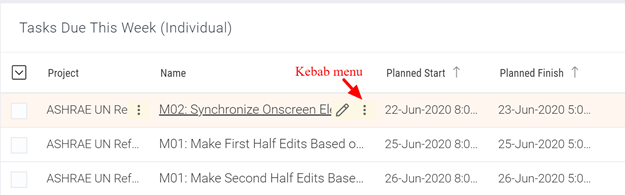
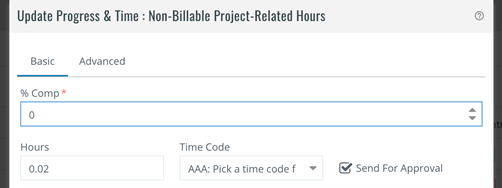
3. Select the kebab menu, and then select Log Time. 4. Complete the following information on the resulting Update Progress and Time pop-up:
- % Comp – enter a number between 0 and 100 to indicate the level of progress on the task.
- Hours – enter the number of hours spent on the task. You can do this in decimal form or as hours and minutes. For example, one hour and 15 minutes would be entered as 1.25 or 1:15.
- Time Code – select the time code that best represents the work you completed. See the list of timecodes available for reporting your time.
- Send for Approval – make sure this checkbox is selected.
- Enter additional comments or details regarding your time as needed.
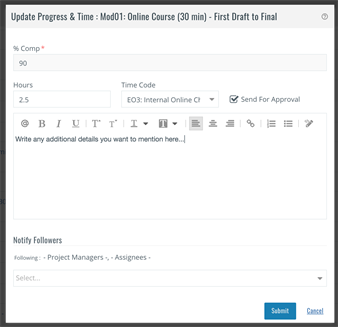
5. When you’re done, select Submit.
Report time via the Celoxis timer
Celoxis includes a timer feature that allows you to easily log time. To create and start a new timer, do the following:
- Find the task to which you want to report your time.
2. Hover to the right of the task name to bring up the task’s kebab menu (vertical ellipsis).

3. Select the kebab menu, and then select Timer.
4. Your task timer automatically starts at the bottom left of your dashboard, shown with a green clock icon.
5. To report your recorded time, select the clock icon. The Timers window opens, along with several options: Pause, Reset, Delete Timer, and Log Time. Select Log Time.
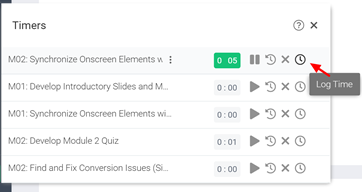
6. The Hours field will be pre-populated for you. Select the appropriate Time Code (see the list of timecodes available for reporting your time), ensure that Send for Approval is selected, and select Submit.